Among the most used actuators in Arduino projects are the buzzers. A buzzer, or electronic buzzer, is a DC powered component that is designed to produce sounds. In consumer and industrial electronics, it lends itself to various uses in games, stopwatches, printers, devices for various types of vehicles, alarms, etc.
In this article we will see how to use an active buzzer to create an alarm with Arduino.
Characteristics of a buzzer
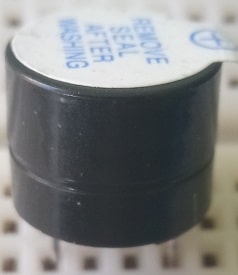
A buzzer contains an integrated circuit and comes with two connectors. When choosing a buzzer, some characteristics must be taken into account, including:
- working voltage and voltage range
- level of sound produced in decibels: the higher the sound we want to produce, the higher the voltage required
- sound emission frequency: normally the buzzers produce sounds at a single frequency ranging from 2 and 4hz
The various types of buzzers include piezoelectric buzzers, active and passive buzzers.
A piezoelectric buzzer contains a piezoelectric crystal connected to a membrane; the crystal contracts or expands according to the applied voltage (the so-called piezoelectric effect), causing the membrane to vibrate and giving rise to sound.
An active buzzer generates a sound if electrified, thanks to its oscillating input, while the passive buzzer, since it does not have this input, requires a square wave direct current signal, with a frequency between 2k and 5k.
The example project in this article will make use of a passive buzzer to generate a “siren” alarm.
The material and the sample circuit
To create the “siren” alarm generation circuit with Arduino, you need:
- an active buzzer powered at 3-5 v
- two male-female jumper cables (preferably of different colors)
- an Arduino board
- a usb cable to connect Arduino to the pc
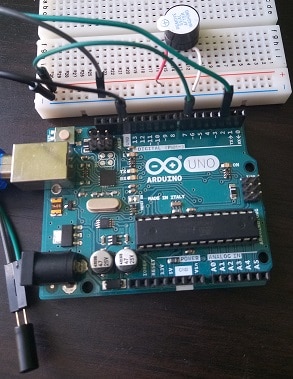
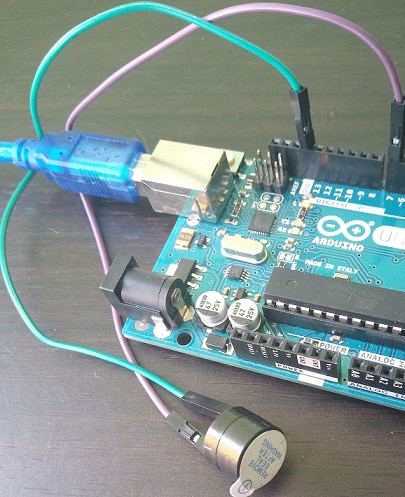
To connect the active buzzer to Arduino, just connect the two pins to the female terminal of the two jumper cables. Next, the negative terminal is connected to the Arduino’s GND ground pin and the positive terminal to digital pin 7.
The example sketch
In the test program, we create the function sound that contains an infinite loop in its block of instructions, two functions are called, each generating a different frequency of sounds:
void sounds () {
  while (true) {
    frequency_1 ();
    frequency_2 ();
  }
}
The infinite loop ensures that, once the function is invoked, it sounds within the Arduino loop, the latter is executed only once.
The frequency_1 function sends current to pin 7 for the duration of one millisecond in a cycle of 80 iterations:
void frequency_1 () {

  for (int i = 0; i <80; i ++)
  {
    digitalWrite (PIN_BUZZER, HIGH);
    delay (1);

    digitalWrite (PIN_BUZZER, LOW);
    delay (1);

  }
}
The frequency_2 function, on the other hand, in a loop of 100 iterations, sends a HIGH signal to pin 7 for the duration of two ms.
void frequency_2 () {
  for (int i = 0; i <100; i ++)
  {
    digitalWrite (PIN_BUZZER, HIGH);
    delay (2); // wait for 2ms

    digitalWrite (PIN_BUZZER, LOW);
    delay (2); // wait for 2ms
  }
}
These two frequencies repeated in sequence generate a sort of siren.
All that remains is to initialize the pin in OUTPUT in the Arduino setup function and call the function sounds in the loop. Here is the complete code of the sketch:
#define PIN_BUZZER 7

void frequency_1 () {

  for (int i = 0; i <80; i ++)
  {
    digitalWrite (PIN_BUZZER, HIGH);
    delay (1);

    digitalWrite (PIN_BUZZER, LOW);
    delay (1);

  }
}

void frequency_2 () {
  for (int i = 0; i <100; i ++)
  {
    digitalWrite (PIN_BUZZER, HIGH);
    delay (2); // wait for 2ms

    digitalWrite (PIN_BUZZER, LOW);
    delay (2); // wait for 2ms
  }
}

void sounds () {
  while (true) {
    frequency_1 ();
    frequency_2 ();
  }
}

void setup () {
  pinMode (PIN_BUZZER, OUTPUT);
}

void loop () {
  it sounds();
}
Try playing with frequencies, changing the delay and number of loops, or adding other frequency_n functions
Conclusion
In this tutorial we have briefly seen what buzzers are, what are their most common uses and how to sound an alarm with a passive buzzer in an Arduino circuit. Buzzers lend themselves to other very interesting uses, such as playing a melody using the tone function. We will see a practical example of a sketch that generates a melody with a passive buzzer in a future article.