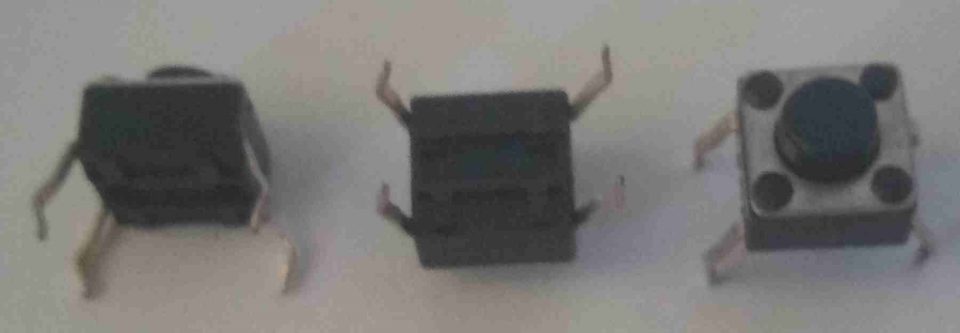
A very useful component in an Arduino project is the mechanical button. It usually appears as a cube of metal and plastic with a small cylinder in the center supported internally by a spring (or by metal plates); it has four connectors with which it can be inserted into the holes of a breadboard. When the button is pressed, the opposite connectors connect electrically, closing the circuit. The photo below shows various angles of a mechanical button.
List of components
Let’s immediately review everything you need to prepare a button control prototype with Arduino. Once everything is assembled we will pass to write the necessary code.
We therefore need:
- a breadboard
- three jumper cables
- a twisted pair jumper
- a 10k ohm resistor
- a mechanical button
- an Arduino board
- a usb cable to connect Arduino to the pc
We will need the resistor to filter out any static electricity or other interference caused by releasing the button. In fact, we will set a digital input pin, connecting it to the key; if voltage fluctuations were to arrive at the pin, the input value would no longer correspond to a value less than or equal to the constant LOW, detecting false presses of the button.
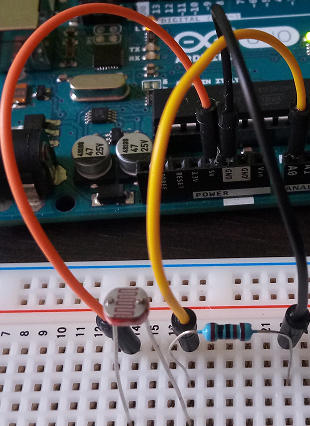
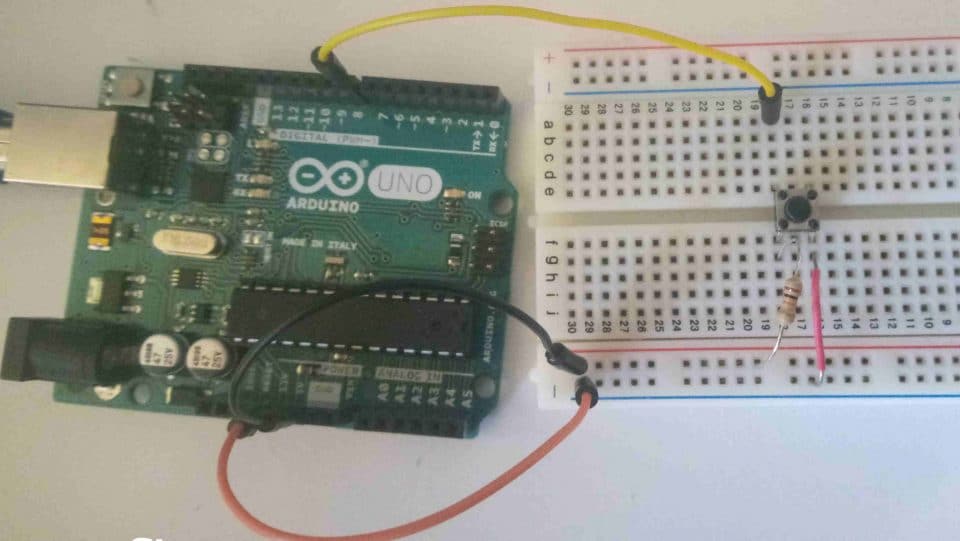
Creation of the circuit to manage a button with Arduino
As can be seen from the photo, digital pin 8 has been connected to a button connector. The corresponding opposite connector is connected to ground (to the GND pin) via the resistor. The connector parallel to the one connected to the resistor goes directly to the Arduino 5V power supply, via the jumper and the jumper cable.
Managing the bounce of a button with Arduino
In addition to the voltage fluctuations that would occur if we connected the button to ground directly without using a resistance, pressing the button can cause bounces, which in turn cause voltage swings, with the result that the state of the button is pressed more times even after releasing it. For this reason, it is advisable to save the input voltage on pin 8 and the state prior to each cycle of the Arduino loop function in different variables. Before comparing if the value received from the pin corresponds to the Arduino constant HIGH, we will have to verify that the previous state and the current state of the button do not coincide (in which case we will consider the key not pressed). It is also advisable to insert a delay of a few milliseconds to wait for the key mechanism to reposition itself with each press.
The source code for managing the mechanical button with Arduino
In the project sketch, we set pin 8 in input mode and initialize the serial communication. To save the button state, we create the previous_status variable and the CURRENT_STATE constant. The first is initialized with the LOW constant, to indicate a low voltage associated with the key in its normal state (not pressed); the second receives the input voltage from pin 8 via the digitalRead function (which will be HIGH if mechanical pressure is exerted on the key). Subsequently, in the conditional test, we verify that the previous state is LOW and that the key has been pressed (CURRENT_STATE == HIGH). If the flow of execution enters the if block, after printing a special alert on the serial, we will apply a delay of 50 milliseconds. In the last line of the loop, we reassign the current state value to the previous_status variable, to re-compare with the next button state in the next cycle.
#define PIN_BUTTON 8

void setup () {
   // initialization of serial communication
   Serial.begin (9600);

   // setting pin 8 in input mode
   pinMode (PIN_BUTTON, INPUT);
}

// state of the mechanical button
int previous_state = LOW;

void loop () {

   // state of the button set by serial monitor
   const int CURRENT_STATE = digitalRead (BUTTON_PIN);

   // verify that the previous state was low and that the key was pressed
   if (CURRENT_STATE! = previous_state && CURRENT_STATE == HIGH) {
     // print on the serial of a notification of pressing the key
     Serial.println ("Key pressed");
     // wait for 50 milliseconds to avoid mechanical bounces
     delay (50);
   }

   // the current state of the button becomes the state prior to the next loop
   previous_state = CURRENT_STATE;
}
Try commenting on the delay and applying more or less prolonged pressures to the button to experience the bounce. Do the same by removing the state management code. What happens on the serial monitor?
Conclusion
We have seen how to manage a mechanical button with Arduino and how to solve the problems related to voltage fluctuations and its rebound. In the source code we made use of a variable declared outside the Arduino loop block; we will discuss this in more detail in a future article, where we will talk about the reuse of code through the creation of functions and we will take the opportunity to see how a library works, such as the one to manage the debounce of a button. We will not just print on the serial monitor, but we will try to turn on a led with a button.